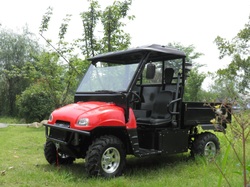
Maybe you just received that bitchin' new long-travel front end or just happen to be in the process of replacing an A-arm that miraculously got wrapped around a tree. Whatever the reason, without proper setup, your suspension could possibly end up resembling something from "The Flintstones." To get you started and headed in the right direction, we need to tackle the front end's toe and camber. If you're wondering, "What the heck is that, and how does it affect me?" here's a simple description. Unlike the rear tires, the front shouldn't be perpendicular to the ground or parallel. The tires, when properly adjusted, will be slightly angled inward (toe-as in pigeon-toed) and tilted toward the machine (camber). The degree of these angles will vary depending on your intended use, but the tuning process remains the same.
It's not unheard of to find a new machine that's in need of adjustment, and most improperly aligned tires will go unnoticed without a thorough examination. Simply replacing a worn ball joint or swapping a bent tie-rod will also require further inspection. This is most obvious when you're cruising along in a straight line and your handlebar is pointed toward your buddy riding beside you. Keep in mind when making these alterations that a seemingly minor turn of the nut results in major movement of the tire. While the automotive industry deals with these same issues using sophisticated machinery and lasers to precisely measure and calculate correct angles, there are other not-so-complex methods you can use to accomplish this feat on your ATV without the high-tech gadgets. The guys at DeRisi Racing took time to reveal these secrets to us in their shop. First off, you'll need these tools: . Basic metric wrench set . Tape measure . 2-foot level . Straightedge . Two tiedowns 1. More than likely, you won't be beginning with an extreme mess as we have here, but we wanted to clearly demonstrate the simplicity of the process. Follow along and learn how to transform this disaster (figure A) into this corner carver (figure B) with complete confidence. 2. Begin by positioning the ATV on a level surface and strapping the bar on both sides to keep it perfectly straight and in the proper position before making any adjustments. 3. Use a long straightedge (Santo's crew prefers a lightweight aluminum bar available from your local home center) positioned firmly against the back wheel extended to the front, which will be used as a measuring point. 4. The toe-in should be between 1/4 to 3/8 inch. This is the difference between the distance of the tires at its foremost and rearmost points. For example: With a center-to-center measurement at the rear of the tire of 43 inches, the same measurement at the front should be 42 3/4 inches for a 1/4-inch total toe-in. The measurement from your straightedge should correspond by achieving half this amount of toe (half because the total is split between the two tires). With the straightedge against the rear of the tire, measure the gap between the front and the straightedge; it should be roughly 1/8 inch. 5. The tie-rods link the steering stem flag to the spindles. The lengths of the tie-rods are adjustable via threaded ends. By increasing or decreasing the length of a tie-rod, you turn the tire to reach your desired measurement from the straightedge. 6. To adjust the tie-rods, first loosen the two nuts at each end of the rods. One will be standard and the other reverse-threaded; turn them several rotations to allow plenty of room for adjustment. 7. Tie-rods have a square edge at one point, allowing it to be turned with a wrench. Simply turn this rod until your tires reach the correct position. Once you have obtained the desired toe on both tires, leave the nuts loose for making slight adjustments after the camber is set. If the camber doesn't require adjustment, tighten down the locking nuts and go ride. 8. It is now time to tweak the camber and get the tires leaning to the correct degree. For a stock machine or a woods racer, 3 to 4.5 degrees are preferred. If you are extending the A-arms for MX or desert use, contact the manufacturer of the components for suggested camber and continue with the following instructions, but using the recommended measurements. A standard 2-foot level will be needed to continue. 9. Setting the camber is a similar process to adjusting the toe, except we will be moving the wheels vertically instead of on a horizontal plane. Begin by placing the level against the tire, keeping the level true (the ball centered). How far off the camber is will determine where the level rests against the tire. In an extreme case like ours, the level could possibly be touching the top of the sidewall when perfectly vertical. 10. You will need to measure the distance between the level and the sidewall at the top of the tire (similar to measuring for the toe adjustment). For 3 to 4.5 degrees, this measurement should be between 1/8 and 1/4 inch. 11. You will be adjusting the camber where the ball joint adjoins the upper A-arm. Threading the ball joint into the A-arm (toward the wheel) or retracting it (away from the wheel) moves the angle outward or inward, respectively. You will need to loosen the lock nut on the ball joint before adjusting. 12. Depending on the brand of A-arms, you may be required to remove the ball joint from the spindle to make an adjustment. Naturally, we are using DeRisi A-arms, which don't require removing the ball joint for adjustments. They have a mechanism that rotates and shifts the ball joint in or out to the desired position. Once the proper camber angle is achieved, tighten the lock nut and recheck the toe. It may need a minor tweak at this point. To finish up, double-check that all the lock nuts on the tie-rods and ball joints are secure, then put on your helmet. It's time for a test ride!
0 Comments
Leave a Reply. |
Categories
All
Archives
December 2019
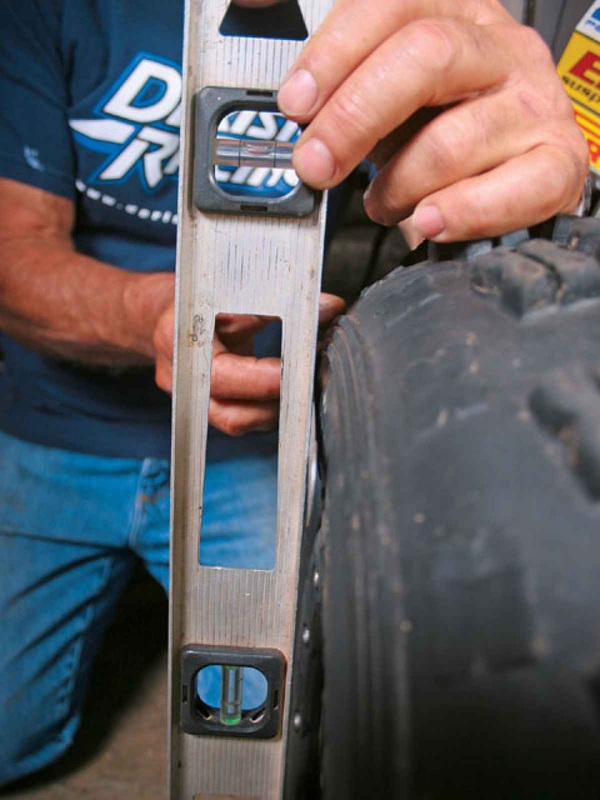
|
 RSS Feed